How Real Estate Agents Can Use Canva Bulk Create for Listing Graphics
Generate just-listed, open house, and sold graphics for every listing at once — without building each one by hand. Here's the exact workflow for real estate agents using Canva Bulk Create.

Every new listing means the same manual work: pull the MLS photo, open Canva, drop in the address, adjust the price, fix the layout, export. Then do it again for the open house graphic. Then the just-sold post.
Multiply that by 10 active listings and it's a part-time job just keeping your social content current.
Canva Bulk Create is built for exactly this — generate a batch of listing graphics from a spreadsheet in one go. The catch is getting your listing photos into the spreadsheet in a format Canva can actually use.
The Problem With Listing Photo URLs
Whether you're pulling data from your MLS, a CRM like Follow Up Boss or LionDesk, or even just a Google Sheet you maintain manually, your listing photos are almost always referenced as URLs — links to images hosted somewhere online.
Canva Bulk Create cannot use those URLs. It requires images to be physically embedded inside the XLSX file, stored as binary image data in individual cells (a format called DrawingML). A URL, no matter how valid, is treated as plain text.
The result: your listing graphic template generates with a blank photo slot, or the URL string gets printed on the design where the house photo should be.
There's no setting in Canva to change this behavior. The file itself needs to be converted before Canva can use it.
What You Need to Get Started
Before building the spreadsheet, nail down two things:
1. Your Canva template
Design a master template for each graphic type you want to batch-generate. Common ones for real estate:
- Just Listed (square or Story format)
- Open House (with date/time fields)
- Price Reduced
- Just Sold
- New to Market / Coming Soon
Each template needs Bulk Create placeholders where the variable data goes — {{address}}, {{price}}, {{beds}}, {{baths}}, and an image element where the listing photo will appear.
2. Your listing data spreadsheet
You need one row per listing with columns matching your template placeholders. Here's what a typical active listing sheet looks like — notice the IMAGE_URL column contains plain text URLs that Canva can't use yet:
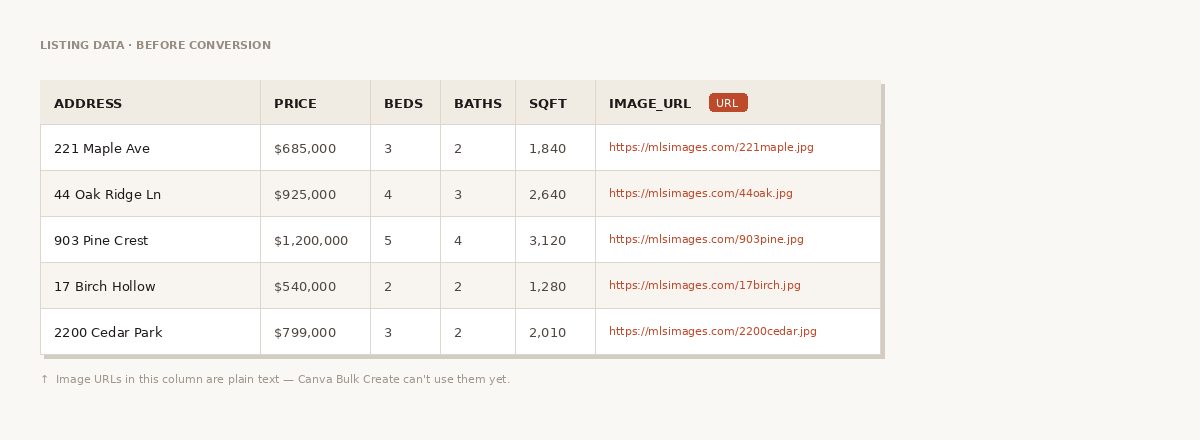
You can build this manually, export from your MLS (most have CSV export), or pull from your CRM.
Step 1: Export or Build Your Listing Spreadsheet
From your MLS:
Most MLS platforms (Matrix, Flexmls, Paragon) let you export search results as a CSV. Run a search filtered to your active listings, select all, and export. Look for fields like ListPrice, BedsTotal, BathsTotal, FullAddress, and MediaURL or PhotoURL.
The photo field naming varies by MLS — it might be MediaURL1, ImageURL, or something similar. That's your image column.
From a CRM:
If you manage listings in Follow Up Boss, LionDesk, or a similar tool, check the export options. Most support CSV export with custom field selection. Include the photo URL field.
Manual (for small pipelines):
For agents with 5-10 active listings, building the spreadsheet manually is often fastest. Keep a running Google Sheet with your active listings and maintain the image URL column by copying the main photo URL from your MLS listing page.
Step 2: Convert Photo URLs to Embedded Images
Here's where the process diverges from what you'd expect. You can't just upload your CSV to Canva — you need to convert it first.
Postprep handles this conversion. It takes your listing CSV, fetches each photo URL, and embeds the images directly into an XLSX file in the format Canva requires. Here's the full flow from upload to download — 6 listings processed in 2 seconds:
- Go to postprep.app
- Upload your listing CSV
- Select your photo URL column (e.g.,
image_url,MediaURL,PhotoURL— whatever your export named it) - Download the converted XLSX
Every photo gets embedded. All your other columns — address, price, beds, baths — stay exactly as they were. The conversion takes under a minute for a typical active listing sheet.
Step 3: Generate Your Graphics in Canva
- Open your listing template in Canva
- Go to Apps → Bulk Create in the left sidebar
- Click Upload data and select the converted XLSX
- Connect fields: drag
addressto the address text element,priceto the price field, and so on — or use Auto-connect if your column names match your placeholder names - Click Generate designs
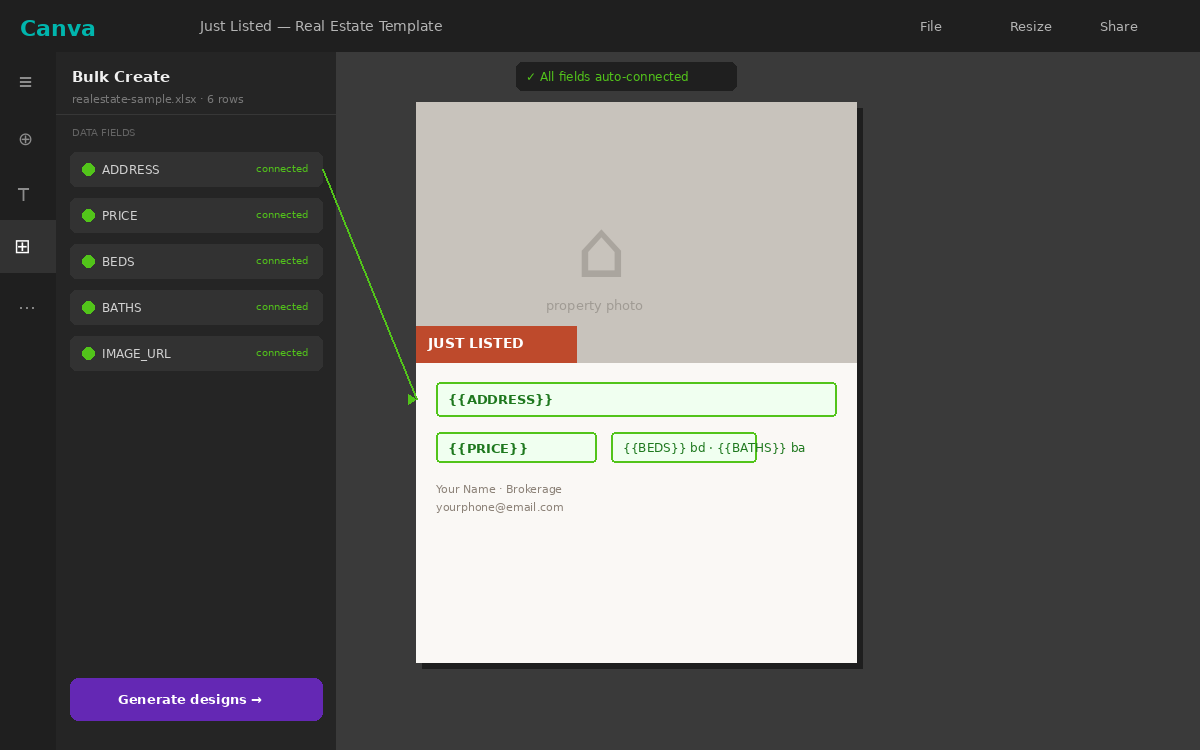
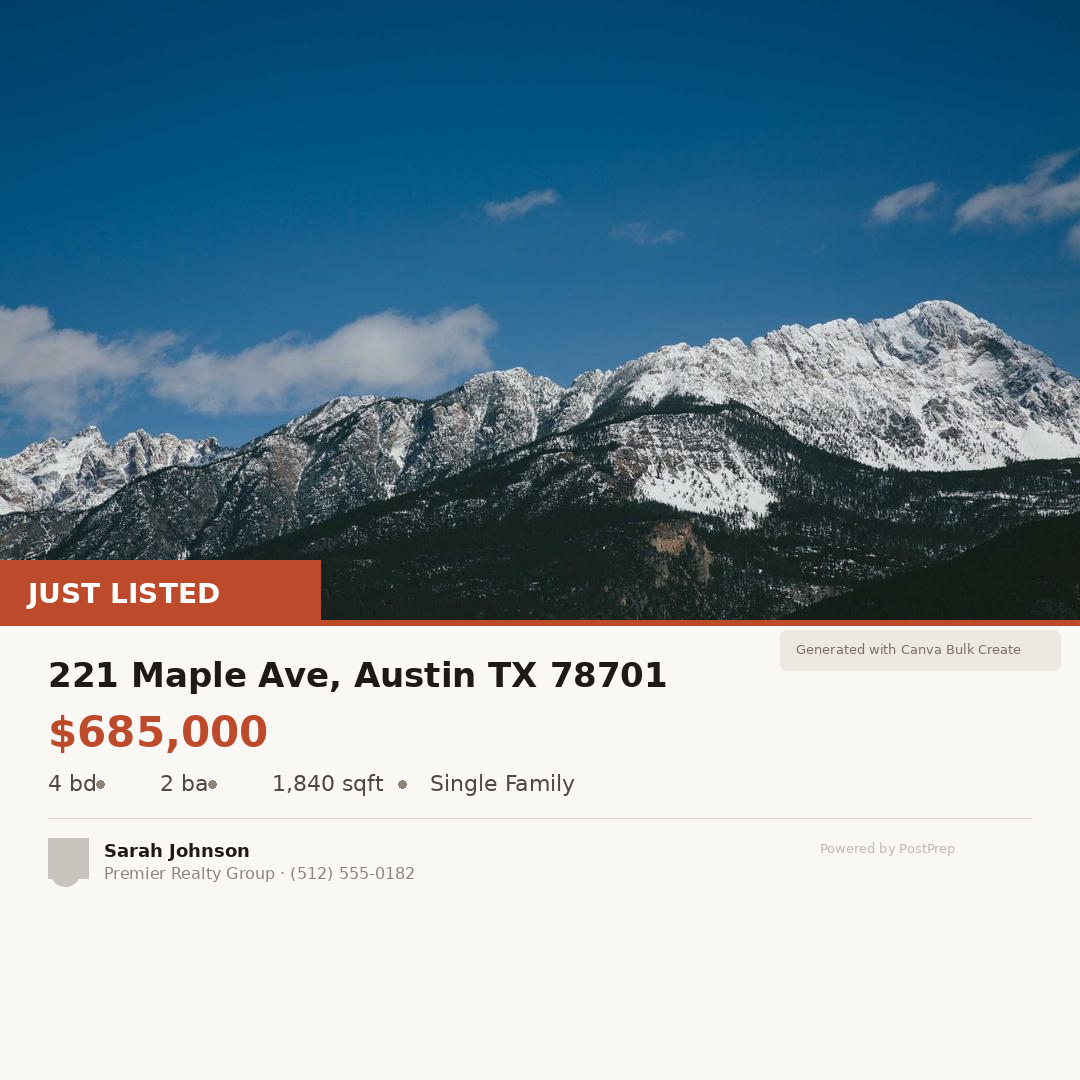
Canva produces one design per listing row, each with the correct photo, address, price, and whatever other data fields you included.
Download the full set as a ZIP. You've got a complete batch of listing graphics ready to schedule or post. Here's what a finished Just Listed card looks like:
Running Multiple Template Types at Once
This is where the workflow really pays off. If you have three template types — Just Listed, Open House, and Just Sold — you can generate all three batches from the same spreadsheet.
Keep your master listing sheet updated. When a new listing goes active:
- Add a row with the listing data and photo URL
- Run it through Postprep once
- Take the output XLSX into Canva three times (once per template)
- Generate each batch
One spreadsheet, three sets of graphics, everything consistent.
When a listing goes under contract or sells, the row is already there for your Just Sold batch — just update the status and rerun.
Frequently Asked Questions
MLS photo URLs expire or require authentication. Will this work?
Some MLS systems use time-limited or session-authenticated photo URLs that break when accessed externally. If Postprep can't fetch the image (it flags unreachable URLs in the output), you'll need to either use a photo hosting service (upload to Google Drive, Dropbox, or your website and use that URL instead) or download the photos and use a tool that accepts local file uploads.
Can I include open house date and time fields?
Yes — just add those as columns in your spreadsheet (open_house_date, open_house_time, or whatever you want to call them) and add matching {{open_house_date}} text elements to your Canva template.
What if I want different photos for different graphic types?
Add multiple image URL columns to your spreadsheet — exterior_photo, kitchen_photo, hero_photo — and connect different columns to different templates. Postprep will embed all of them.
How often should I regenerate the full batch?
Most agents run it weekly — once to generate Just Listed graphics for new listings, and once to generate Just Sold graphics for recently closed deals. Set a 15-minute block on Fridays and it stays current.
Does this work for rentals and property management too?
Yes. The workflow is identical — listing data plus photo URLs, converted to XLSX, bulk-generated in Canva. The template design changes, the process doesn't.
The Short Version
Canva Bulk Create can eliminate the repetitive manual work of building individual listing graphics — but only once your photo URLs are converted to embedded images. Postprep does that conversion in one step.
Export your MLS data → convert with Postprep → bulk-generate in Canva. New listing to finished graphics in under 5 minutes.
Try it free at postprep.app — 100 rows, no account required.